
Point of Sale (POS) systems have become an essential part of modern businesses. They help streamline transactions, track sales, and improve efficiency in retail stores, restaurants, and other service-based businesses.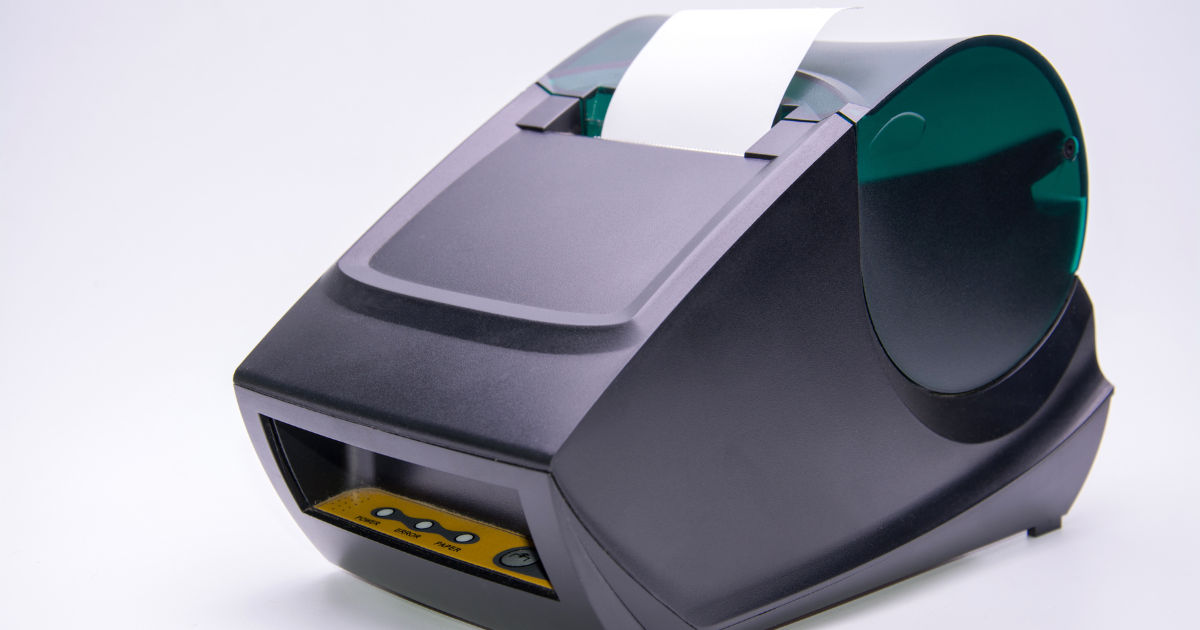
One of the crucial components of a POS system is the thermal printer. A thermal printer is a type of printer that uses heat to print receipts, invoices, and order slips directly onto a thermal printer roll.
If you are setting up a new POS system or upgrading your hardware, understanding how to properly install and configure a thermal printer is critical for smooth business operations.
This guide will walk you through everything you need to know about setting up a thermal printer for POS systems, from unboxing and hardware setup to software installation and troubleshooting.
By the end, you will be ready to handle your POS printing efficiently and reliably with the right thermal printer roll.
What is a Thermal Printer?
A thermal printer is a printer that uses heat-sensitive paper to produce images or text. Unlike traditional ink printers, thermal printers do not require ink cartridges or toner. Instead, they rely on a special paper called a thermal printer roll. When the printer applies heat to the paper, the surface changes color to form text or images.
Thermal printers are widely used in POS systems because they are fast, quiet, and cost-effective. They are perfect for printing receipts, tickets, labels, and order slips. The simplicity of thermal printing makes it ideal for high-volume environments like cafes, restaurants, retail shops, and supermarkets.
Types of Thermal Printers
Understanding the types of thermal printers will help you choose the right one for your POS system. There are two main types:
Direct Thermal Printers
Direct thermal printers use heat-sensitive paper and do not require ink. When heat is applied, the paper changes color to form the print. This method is fast and requires minimal maintenance. However, the prints can fade over time, especially when exposed to sunlight or heat.
Thermal Transfer Printers
Thermal transfer printers use a ribbon to transfer ink onto the paper. This method produces durable prints that last longer and can resist fading. Thermal transfer printers are commonly used for labels, barcodes, and long-term receipts.
Components of a Thermal Printer
Before setting up your thermal printer, it is important to know its key components:
-
Thermal Printer Roll: The heat-sensitive paper used for printing.
-
Print Head: The element that generates heat to create the text or image.
-
Cutter: Some printers have an automatic cutter that trims receipts.
-
Power Supply: Provides electricity to the printer.
-
Interface Port: Connects the printer to the POS system (USB, Ethernet, or Bluetooth).
-
Control Panel: Allows basic printer operations like feed or test print.
Choosing the Right Thermal Printer for Your POS System
Selecting the right printer ensures efficiency and reliability. Consider these factors when choosing a thermal printer:
-
Print Speed: Higher speeds are suitable for busy environments.
-
Resolution: Standard resolution is 203 dpi, while higher resolution (300 dpi) is available for detailed prints.
-
Connectivity: Choose USB, Ethernet, or wireless options depending on your POS setup.
-
Compatibility: Make sure the printer works with your POS software.
-
Paper Size: Standard thermal printer rolls are 80mm or 57mm in width.
Unboxing and Initial Setup
When your thermal printer arrives, follow these steps to prepare it for use:
-
Unbox Carefully: Remove the printer and accessories. Check for the power adapter, cables, and thermal printer roll.
-
Inspect for Damage: Ensure there are no visible damages or missing parts.
-
Connect Power: Plug in the power adapter and switch on the printer.
-
Install Paper Roll: Open the printer cover, place the thermal printer roll in the compartment, and ensure the paper feeds correctly.
Proper installation of the thermal printer roll is essential. Make sure the paper is positioned correctly with the thermal side facing the print head. Incorrect placement can lead to blank or faded prints.
Connecting Your Thermal Printer to a POS System
Thermal printers can connect to a POS system in different ways depending on your printer model.
USB Connection
-
Connect the USB cable from the printer to your POS terminal.
-
Turn on the printer and POS system.
-
Install the necessary printer drivers provided by the manufacturer.
Ethernet Connection
-
Connect the printer to your network router using an Ethernet cable.
-
Assign an IP address to the printer.
-
Configure your POS software to recognize the printer via the network.
Wireless or Bluetooth Connection
-
Enable Bluetooth or Wi-Fi on your printer.
-
Pair the printer with your POS device.
-
Ensure that the printer is visible and connected in the POS software settings.
Installing Printer Drivers
Printer drivers are essential for communication between your thermal printer and the POS software. Here is a simple process:
-
Download the latest driver from the manufacturer’s website.
-
Run the installation file and follow the prompts.
-
Select the correct port or interface for your printer connection.
-
Test the printer to ensure it prints a sample receipt.
Configuring Your POS Software
After installing the printer, configure your POS system to print receipts correctly:
-
Open the POS software settings.
-
Navigate to the printer or receipt setup section.
-
Select your thermal printer from the list of available devices.
-
Choose the paper size corresponding to your thermal printer roll.
-
Set print preferences like font size, margin, and logo printing.
-
Perform a test print to verify that everything is aligned correctly.
Loading and Replacing Thermal Printer Roll
Loading the thermal printer roll correctly ensures smooth printing. Follow these steps:
-
Open the printer cover.
-
Remove the empty roll.
-
Insert a new thermal printer roll with the thermal side facing the print head.
-
Pull a small length of paper out and close the cover.
-
Use the feed button to adjust the paper and ensure it prints correctly.
Regularly checking the thermal printer roll is important to prevent printing interruptions. Keep extra rolls on hand to avoid downtime.
Common Troubleshooting Tips
Even with proper setup, thermal printers can sometimes encounter issues. Here are common problems and solutions:
-
Printer Not Responding: Check power connections, USB/Ethernet cables, and ensure drivers are installed.
-
Blank Receipts: Verify the thermal side of the printer roll is facing the print head.
-
Paper Jam: Open the cover and remove the jammed paper carefully. Ensure the roll is properly seated.
-
Faded Prints: Replace old or low-quality thermal printer rolls. Adjust print density settings if available.
-
Connectivity Issues: Ensure the correct interface is selected in the POS software. Reconnect or restart devices if necessary.
Maintaining Your Thermal Printer
Proper maintenance increases the lifespan of your thermal printer. Follow these tips:
-
Clean the Print Head: Use isopropyl alcohol and a soft cloth to clean the print head regularly.
-
Check Paper Quality: Use high-quality thermal printer rolls to prevent damage.
-
Avoid Dust and Moisture: Keep the printer in a clean, dry environment.
-
Update Drivers and Firmware: Regular updates can prevent compatibility issues and improve performance.
Advantages of Using Thermal Printers in POS Systems
Thermal printers offer multiple benefits:
-
Speed: Prints receipts and orders quickly, reducing wait times.
-
Cost-Effective: No need for ink or toner. Only thermal printer rolls are required.
-
Quiet Operation: Ideal for quiet environments like cafes.
-
Durability: Minimal moving parts reduce wear and tear.
-
Ease of Use: Simple to load paper and perform maintenance.
Tips for Choosing the Right Thermal Printer Roll
The thermal printer roll you choose can affect print quality. Keep these factors in mind:
-
Paper Size: Ensure it matches your printer specifications (80mm, 57mm).
-
Paper Quality: Higher quality rolls produce sharper prints and last longer.
-
Core Size: Some printers require a specific core diameter.
-
Length of Roll: Longer rolls reduce the frequency of paper replacement.
Advanced Features of Modern Thermal Printers
Many thermal printers come with advanced features to enhance POS operations:
-
Auto Cutter: Automatically cuts receipts for convenience.
-
Multiple Connectivity Options: USB, Ethernet, Wi-Fi, or Bluetooth.
-
Customizable Receipts: Supports logos, QR codes, and barcodes.
-
Energy Efficient: Low power consumption compared to traditional printers.
Testing Your Thermal Printer
Before starting regular operations, it is essential to test your thermal printer:
-
Perform a self-test using the printer’s control panel.
-
Print sample receipts from the POS software.
-
Check for print clarity, alignment, and completeness.
-
Adjust settings as needed for font size, margins, or logos.
Common Mistakes to Avoid
When setting up a thermal printer, avoid these mistakes:
-
Using the wrong type of paper for your printer.
-
Ignoring driver installation or software updates.
-
Failing to configure the printer settings in POS software.
-
Overlooking maintenance and cleaning schedules.
-
Neglecting to check paper orientation and quality.
Conclusion
Setting up a thermal printer for a POS system may seem complicated at first, but with the right steps, it becomes straightforward. From understanding the types of printers and selecting the right thermal printer roll to installing drivers, configuring POS software, and maintaining the printer, each step is important for smooth operation.
A well-set-up thermal printer ensures fast, reliable, and high-quality receipt printing. Proper handling and regular maintenance can extend the printer's life and reduce downtime. Whether you run a small retail shop, a busy restaurant, or a large supermarket, mastering your thermal printer setup will improve efficiency, customer satisfaction, and overall business operations.
Investing in good-quality thermal printer rolls and following the setup instructions carefully ensures your POS system operates without interruption. Remember, the key to successful printing lies in preparation, correct installation, and consistent maintenance.
By following this comprehensive guide, you are now equipped to handle your POS thermal printer like a professional. Enjoy the convenience and efficiency that comes with a properly configured POS printing system.